8 Fun Bug-Themed Crafts To Do With Your Kids
Happy Mother’s Day from Pointe Pest Control! This weekend is all about celebrating the wonderful mother figures in our lives and everything they do for our families. DIY crafts are always a fun way for parents to spend quality time with their children, and there is no better time to do this than Mother’s Day weekend. A quick online search gives you thousands of crafts to do with your little ones, using basic supplies you might already have at home. So get out your glue sticks and pipe cleaners: we’re diving into 8 entertaining bug-themed crafts!
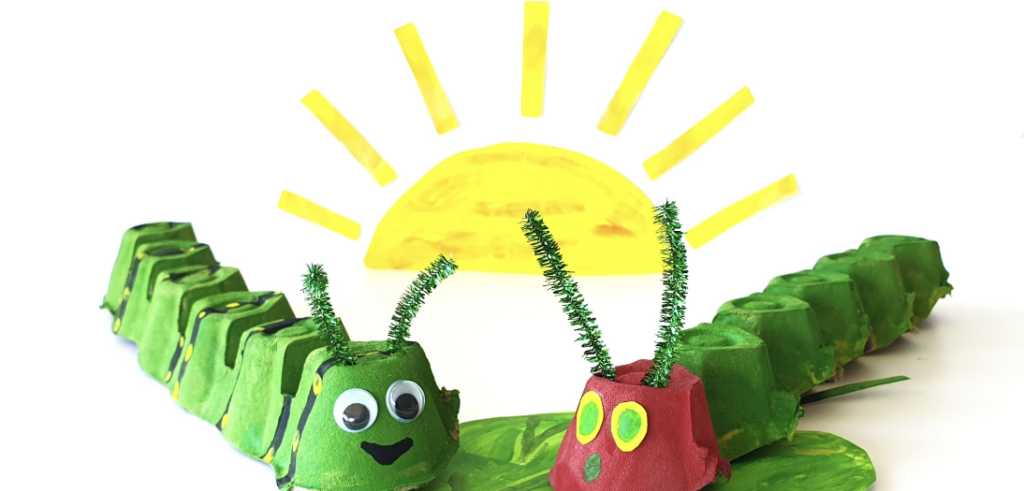
Egg Carton Caterpillars
Materials:
- 1 egg carton (empty)
- Scissors
- Non-toxic paint (colors of choice)
- Paint brushes
- Glue
- Pipe cleaners, cut into 2-inch-long pieces (colors of choice)
- Googly eyes
- Sharpie
Cut the dimpled part of the egg carton in half to give you 2 caterpillars. If you want 4 caterpillars, cut each half in half again. Paint each dimple the color of your choice and let dry. On one end of the caterpillar, poke 2 small holes in the top of the end dimple with scissors. Poke 1 pipe cleaner piece into each hole to give the caterpillar 2 antennae. Glue 2 googly eyes to the front of the caterpillar’s head. Use a Sharpie to draw a smile on its face and spots or stripes on its body, if desired. Repeat this process with each caterpillar.
Note: Paint the head with red paint and the body with green paint to make the famous caterpillar from The Very Hungry Caterpillar!
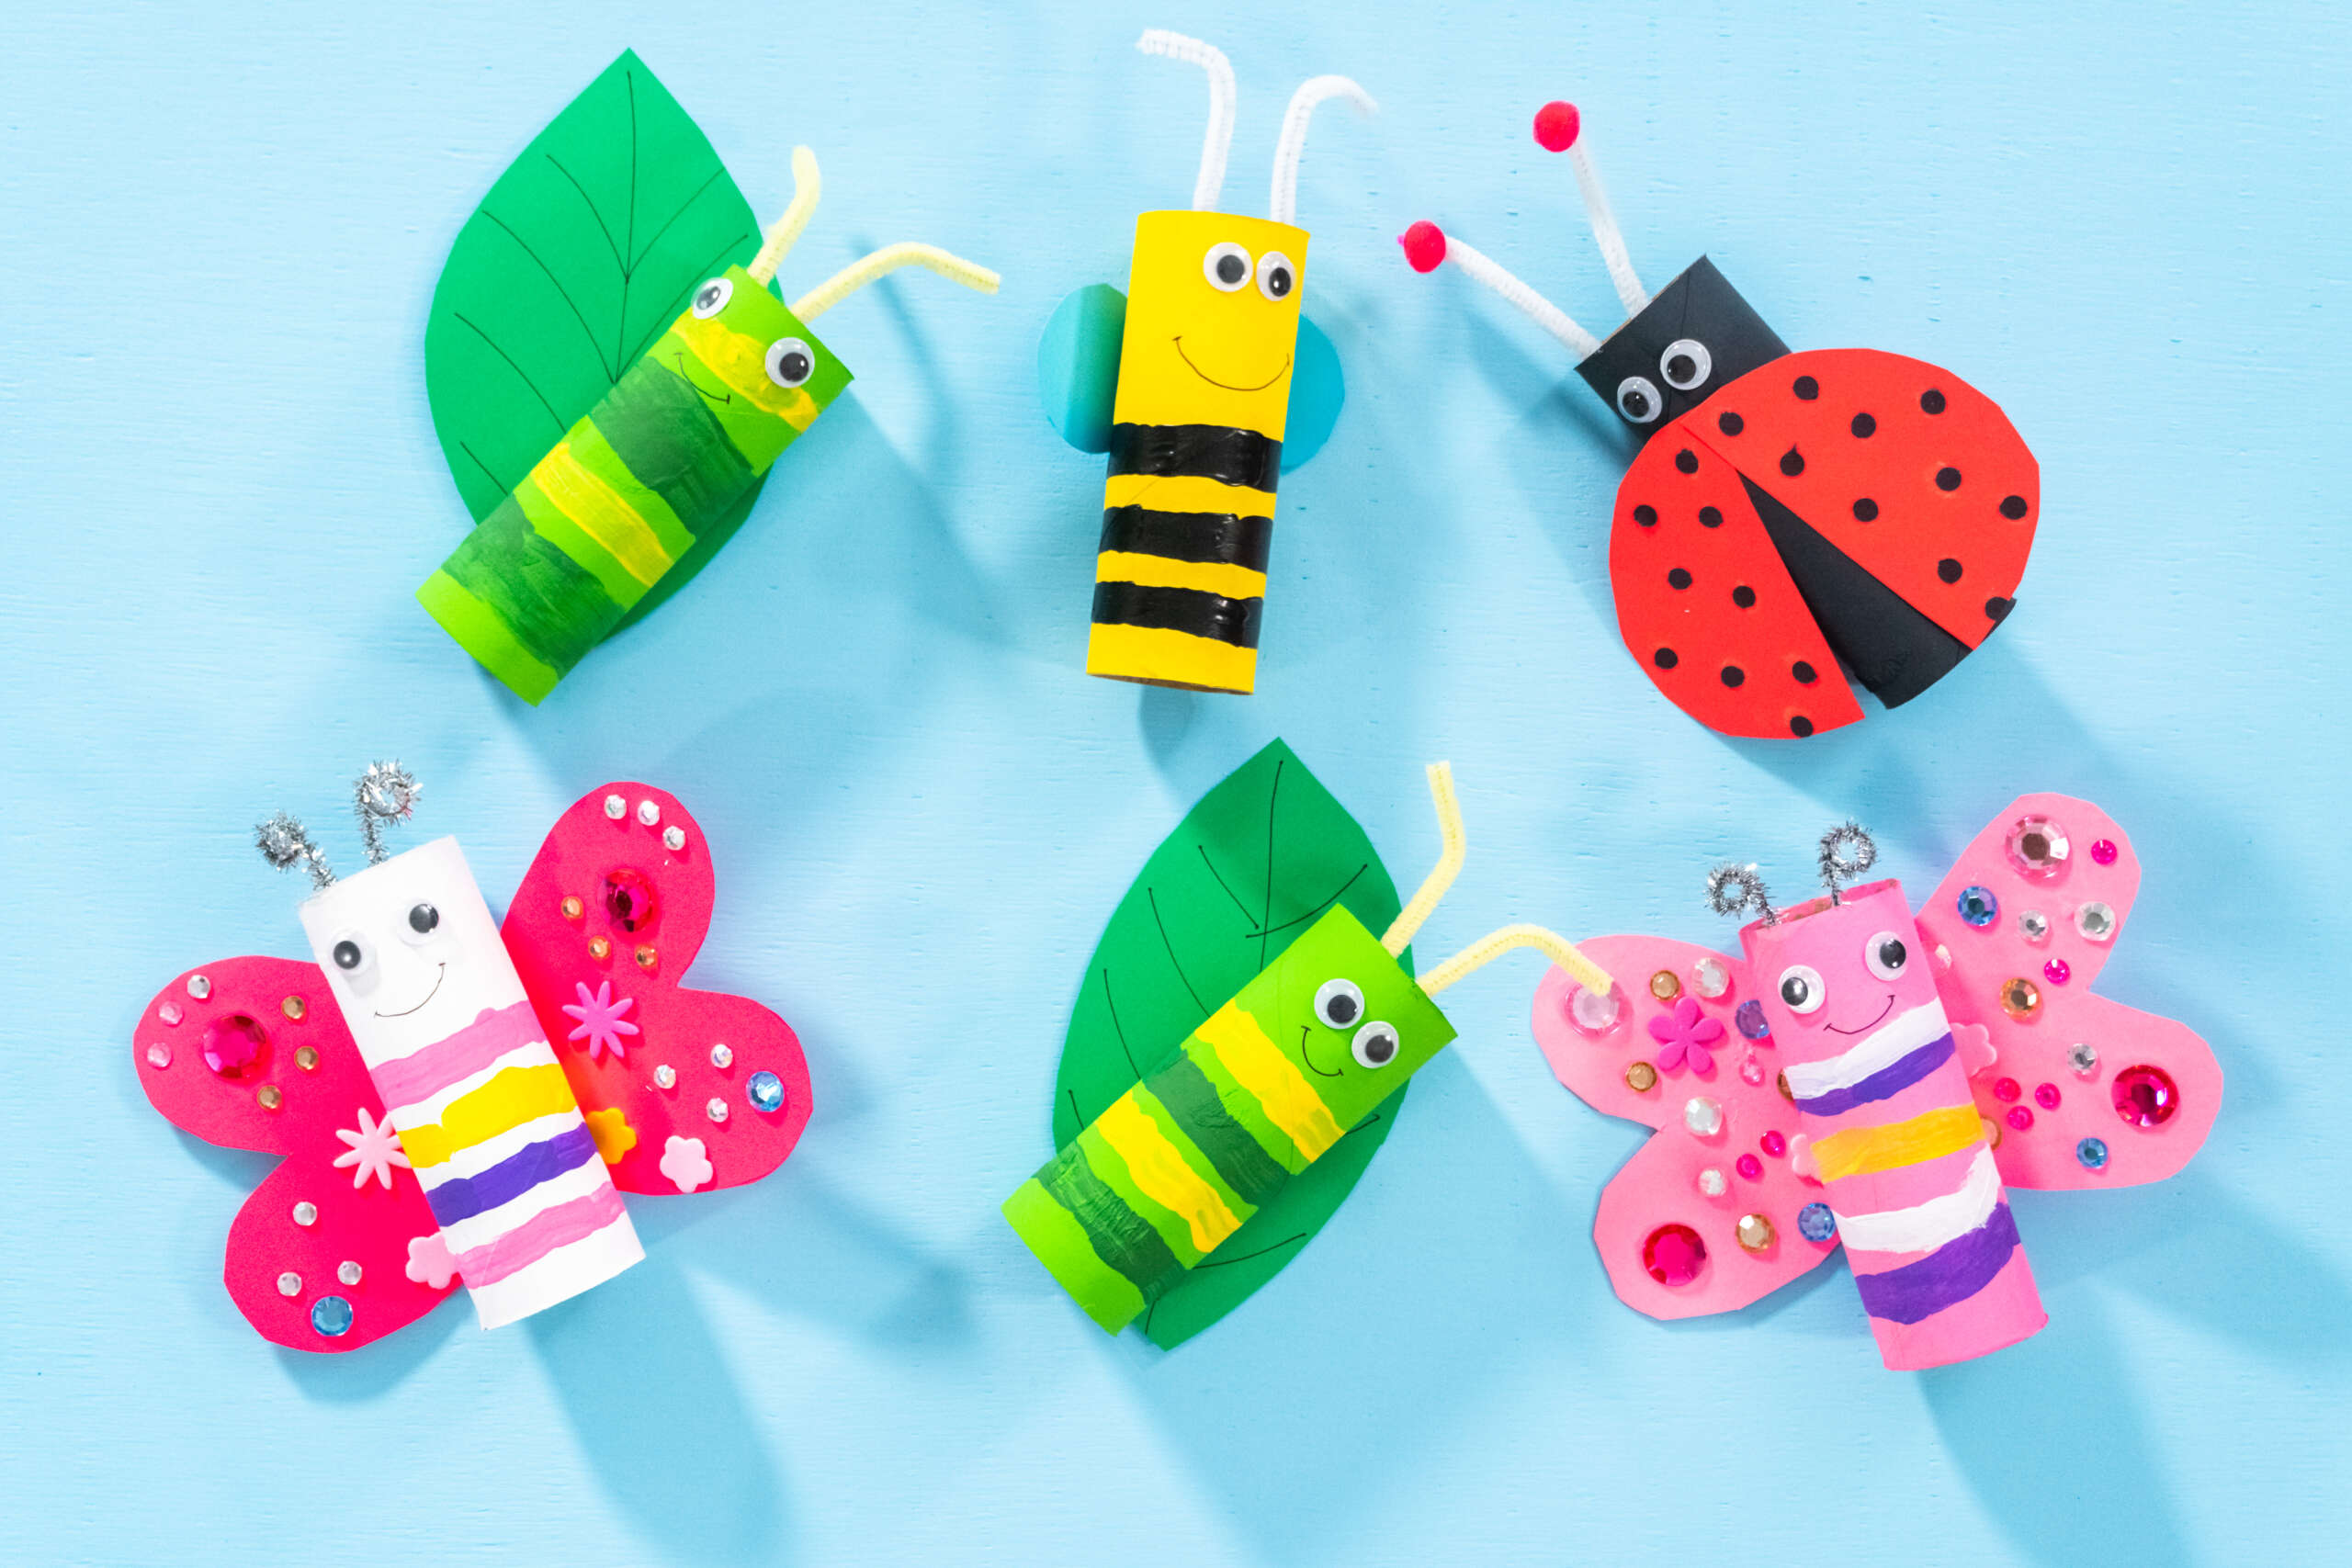
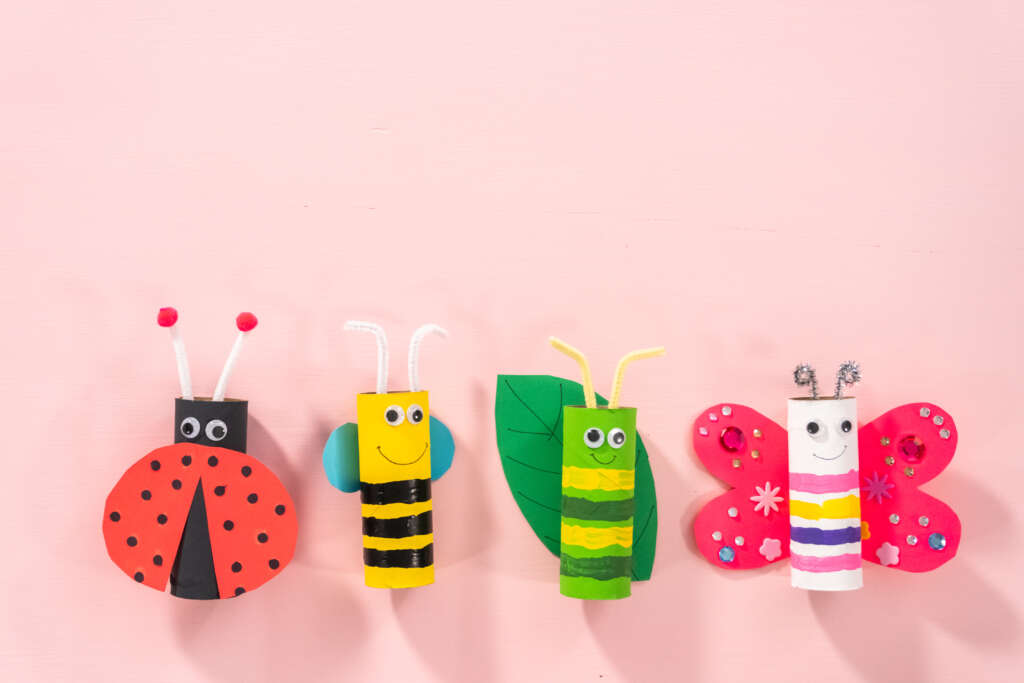
Cardboard Tube Bugs
Materials:
- Toilet paper tubes (1 per bug)
- A paper towel tube cut in half would also work
- Non-toxic paint (colors of choice)
- Paint brushes
- Googly eyes
- Glue
- Markers
- Scissors
- Pipe cleaners (cut into 2 or 3-inch-long pieces)
- Construction paper (colors of choice)
Paint the cardboard tube one color to act as the body of the bug and let dry. If your bug needs stripes, paint those and let dry. While the paint dries, cut out wings for your bug (see ideas below) and glue on the tube when the paint is dry. Glue 2 googly eyes near the top of one side. Glue 2 pipe cleaner pieces on the inside of the side with the eyes to act as the antennae. Draw a smile on the tube with marker. Repeat the basic process with each tube until you have the desired number of bugs.
Here are some ideas for specific bugs:
- Ladybug: For the wings, cut a large circle in red construction paper, then cut out a wedge about 3/4 of the way through the middle. Glue to the front of the finished tube. Draw black dots with marker or paint small circles with black paint to create the spots.
- Caterpillar: Paint horizontal stripes on the tube, alternating 2 or 3 colors. For the leaf, cut a large football-shaped piece of green construction paper. Draw leaf veins in marker (see above image for example). Glue the vein side onto the back of the caterpillar body.
- Butterfly: Paint horizontal stripes on the tube, alternating 2 or 3 colors. For the wings, fold a piece of construction paper in half and draw the top half of a heart, parallel with the crease. Cut along the shape, then unfold to reveal the set of wings. Glue to the back of the butterfly body. Glue craft gems or stickers to both sides to make a pretty pattern!
- Bee: Paint 3-4 black horizontal stripes on the tube. For the wings, cut two 2-inch-wide circles out of blue construction paper. Glue each circle to the back of the bee body.
Note: If you make multiple bugs, you can put on a bug-themed puppet show!
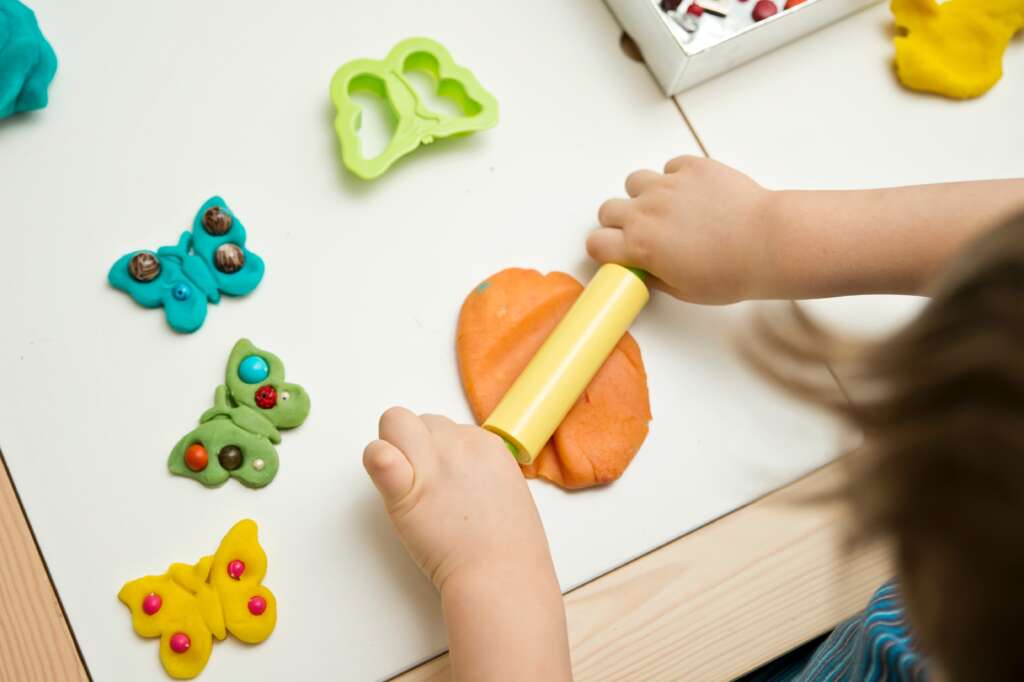
Dough Bugs
Materials:
- Play-Doh or other safe-to-eat dough (colors of choice)
- A rolling pin-like object, like a bottle or a can
- Cookie cutters in the shape of bugs (butterflies, bees, etc.)
- Small decorative objects (beads, gems, etc.)
Roll out a portion of dough until it’s about 1 inch thick. Use the cookie cutters to cut out your bug shapes of choice. Set aside each bug to have room for decorating and discussing. If your bug has wings, decorate them with your small objects. Beads, gems, feathers, googly eyes, and pom-poms are all great for this!
Note: If your bug has a lot of legs, try to have the same number as the real deal. Ask your younger kids to count the number of legs for a bonus lesson on numbers.
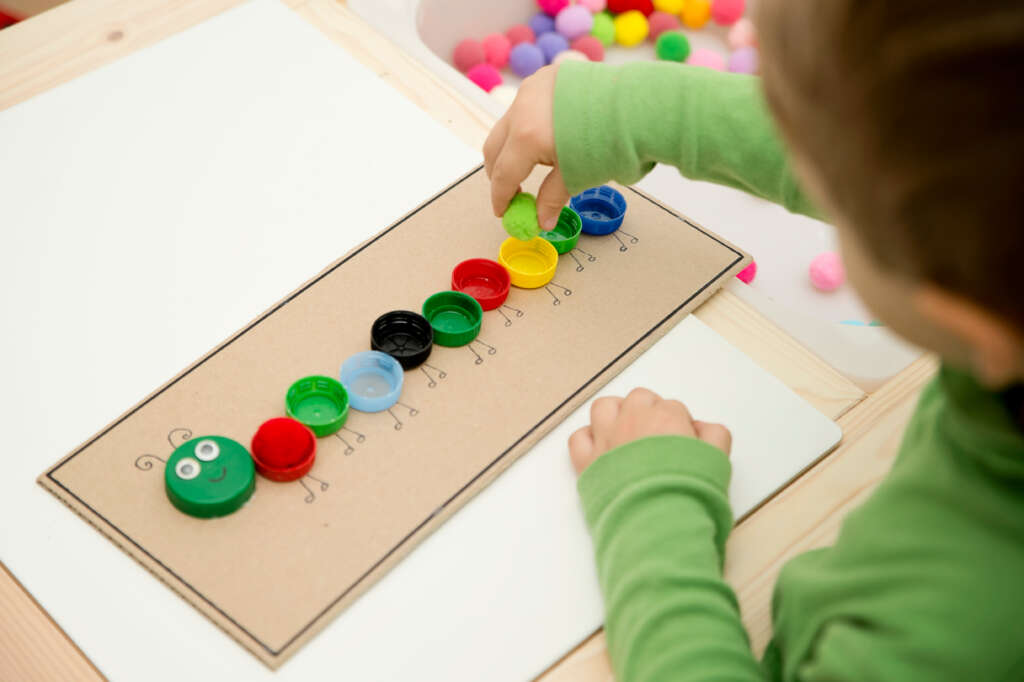
Bottle Cap Caterpillars
Materials:
- Bottle caps (from soda bottles or water bottles)
- Hot glue gun
- Googly eyes
- Small piece of cardboard or construction paper
- Sharpie
- Pom-poms (optional)
Glue 2 googly eyes to the flat side of one cap. Draw a smile in marker below the eyes. Glue the caterpillar’s head (opened side down) on the left side of your cardboard or construction paper. Add the desired number of caps to the right of the head to make the caterpillar’s body and glue to the cardboard or paper. You can slightly zigzag the caps to make it look like the caterpillar is moving. Draw 2 antennae on the surface above the head, and 2 feet right under each cap on the cardboard or paper.
Optional: If you have pom-poms of the same colors as the bottle caps, you can help your children match the same-colored pom-poms to the caps. Glue a pom-pom onto each cap to make the caterpillar even more 3D.
Note: This is a fun way to teach little ones about colors and counting all in one!
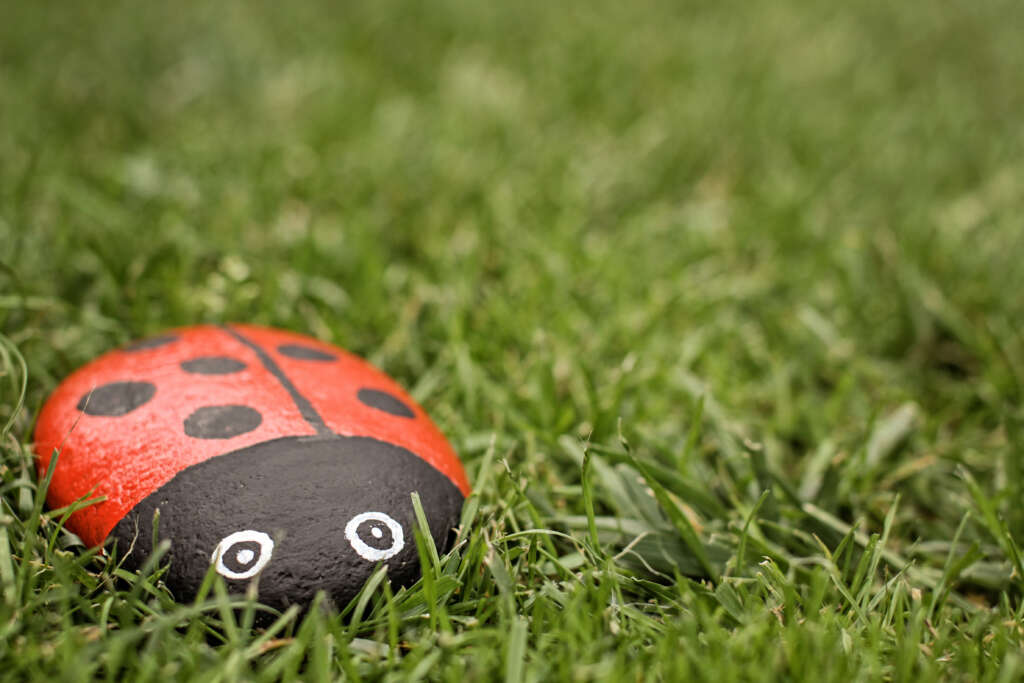
Stone Bugs
Materials:
- Smooth river rocks for crafting (1 per bug); available online and at craft stores
- Non-toxic paint (colors of choice)
- Paint brushes
- Sharpie
Paint the rock to look like your bug of choice! One fun example is a ladybug: paint 3/4 of the rock red, then the remaining portion black for the head. Once that dries, paint a black stripe down the middle and black spots on either side of the stripe. In general, if you want the bug to be mostly one color, paint that solid color first and let dry before adding stripes or spots. Paint 2 eyes and a smile on one end to act as the head. Let dry completely before handling.
Note: This one is great if you want to make a lot of bugs! The packs of smooth rocks usually come with 20-100 pieces, so you can repurpose them for other crafts afterward.
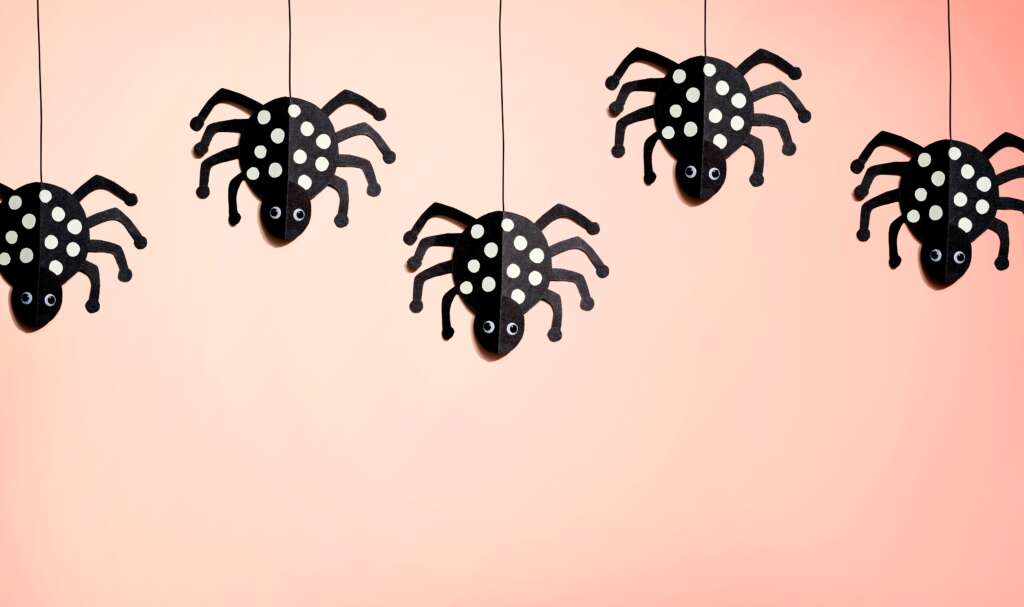
Construction Paper Spiders
Materials:
- Black construction paper
- Scissors
- Googly eyes
- Glue
- Black yarn
- Hole punch (optional)
- White construction paper (optional)
- Red construction paper (optional)
From a piece of black construction paper, cut 1 large circle and 1 smaller circle to make the body and head, respectively. Glue the edge of the smaller circle onto the larger circle. Cut out 8 legs (think of loose L-shapes) from the black construction paper. Glue the legs onto the back of the body, 4 on each side. Glue googly eyes onto the head. Cut a piece of black yarn about 1 foot long and glue one end to the back of the body to act as the spider’s web strand.
Spots: If you want your spider to have spots, cut out or hole-punch circles from a piece of white construction paper. Glue onto the spider’s body.
Hourglass: If your spider is a black widow (scary!), draw an hourglass shape on a piece of red construction paper and cut out with scissors. Glue onto the center of the spider’s body.
Note: You can tape the yarn to a doorframe or window in the house to make it look like the spider is coming down!
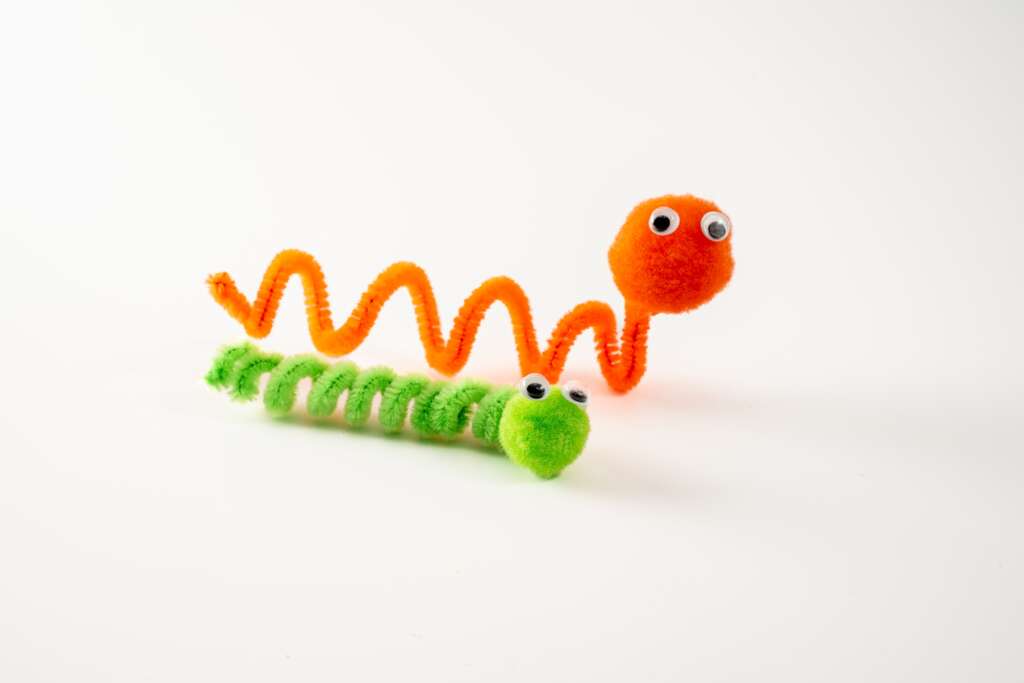
Pipe Cleaner Bugs
Materials:
- Pipe cleaners (colors of choice)
- A cylindrical object for shaping (pencil, bottle, etc.)
- Googly eyes
- Pom-poms (colors of choice)
Take a pipe cleaner and wrap it tightly around the cylindrical object. Pencils, thin bottles, and tapered candles work best for this. The goal is to have a curlicue-shaped insect body, so the tightness of the twists is up to you! Remove the pipe cleaner by sliding it down the object until you have the twisted pipe cleaner by itself. Glue a pom-pom to one end of the pipe cleaner to act as the head. Glue 2 googly eyes to the pom-pom.
Note: This is another easy craft that’s great for making as many bugs as you want!
Cap Ladybugs
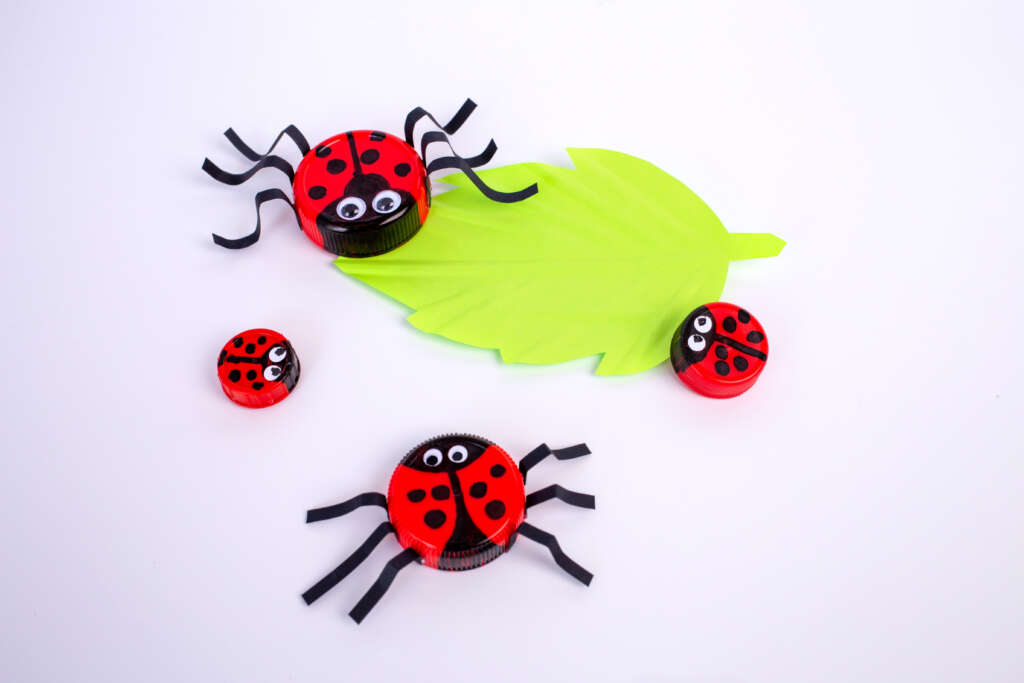
Materials:
- Caps of various sizes (from soda bottles, water bottles, milk jugs, spice jars, olive oil bottles, vinegar bottles, olive jars, etc.)
- Black non-toxic paint
- Paint brushes
- Googly eyes
- Black construction paper
- Scissors
- Non-toxic red paint (if needed)
If your cap isn’t red, paint it completely with red paint and let dry. Paint about 1/4 of the flat side of the lid black to act as the head. Paint a black stripe down the middle and black spots on either side of the stripe. Let dry. Glue 2 googly eyes onto the “head.” Cut out 6 strips from the black construction paper, about 2 inches long each. Glue each strip to the sides (3 on each side) of larger lids to act as the legs.
Note: It’s fun to craft with lids of all sizes to make a family of ladybugs!
Stop Those Pesky Pests With Pointe!
These crafts are fun activities to do with your family, but dealing with real pests? That’s a much less enjoyable way to spend your time! At Pointe Pest Control, our licensed technicians strive to solve each pest issue as efficiently and safely as possible. We start each service with a full inspection of the property, then use our observations to create a treatment plan that’s personalized to fit your pest control needs. Our team is happy to answer any question or concern that you have along the way. We look forward to keeping pests out of your home for good, so contact us today for a free quote on our reliable services!